
The triangle frame thing started life as a Pinterest workaround for renters who couldn't fit a real tree, and somewhere along the way it became my favorite holiday build. Three open wooden triangles, lit from inside with copper-wire fairy lights, dressed with pinecones and a couple of ornaments.
One Saturday to build. The rest of the year they lean flat behind a bookshelf. The version below uses 1×2 pine, one 15-degree saw setting (the legs lean 15° off vertical and meet in a ~30° peak), and pocket-hole joinery, which is the part that matters: the joints stay tight when you drag the frames in and out of storage every December. Around $90 if you already own a drill and a saw. Closer to $160 if you don't.

What you're building
Three open isosceles triangles in graduated heights: 48 inches, 36 inches, and 28 inches tall, with base widths of 26, 19, and 15 inches. Every cut uses one 15-degree saw setting, so you set the saw once and forget about it. What forms the tree shape is geometry, not the cut angle: each leg leans 15° off vertical, the two legs lap over each other at the top to make a roughly 30-degree peak, and the base butts against the inside faces of the legs.
Don't try to miter the leg tops into a point at 15°, two ends butted at that setting open to about 150°, almost flat. The frames lean on the wall rather than standing free, which means no brace, no back panel, nothing structural beyond two pocket screws and a bead of glue at each corner. You need about 25 linear feet of 1×2 , four 8-foot boards with modest offcuts left over.
About the three-frame thing. A lone triangle on a blank wall reads as a sign for something. Three at three different heights read as a tree line, and the staggered apex points trick the eye into seeing a small forest. If you only have room for one, build the 36-inch middle size and put it on the floor next to a chair instead of dead-center on a wall, where it'll look like signage again.
Materials and tools shopping list
Materials (consumables)
| Qty | Item | Spec | Price |
|---|---|---|---|
| 4 | 1x2x8 ft select pine boards | straight grain, no large knots near cut points | $15 to $24 |
| 1 | Titebond Original Wood Glue, 16 oz | aliphatic resin, indoor projects | $8 to $11 |
| 1 | Kreg pocket-hole screws, 1-1/4 in coarse, 100-count | for 3/4 in softwood stock | $8 to $12 |
| 1 | 3M aluminum oxide sandpaper, 100/150/220 grit assortment | 5 sheets, hand sanding | $6 to $9 |
| 1 | Minwax Wood Finish in Pickled Oak, 1 quart | optional, oil-based penetrating stain | $14 to $18 |
| 3 | 33 ft 100-LED warm white copper-wire fairy lights, battery operated | one per frame, remote and timer | $24 to $33 |
| 1 | Natural pinecones, 24-pack | 2 in to 3 in, unscented | $12 to $16 |
| 1 | Gold glitter shatterproof ball ornaments, 6-pack 3.94 in | light enough to hang from twine | $15 to $22 |
| 1 | Natural jute twine, 2 mm x 100 yd | 3-ply brown, for hanging ornaments | $5 to $8 |
| 1 | Fresh blue spruce or noble fir tips | about 6 small sprigs, from a tree lot scrap bin | Free to $5 |
| Materials subtotal | $107 to $158 | ||
Tools (one-time, reusable)
| Qty | Item | Spec | Price |
|---|---|---|---|
| 1 | Miter saw or compound miter saw | set to 15-degree bevel, 7-1/4 in or 10 in blade | $0 (own) or $120 to $180 |
| 1 | Kreg Pocket-Hole Jig 320 with face clamp | for 1/2 in to 1-1/2 in stock | $45 to $60 |
| 1 | Cordless drill with #2 square driver | 12V or 18V, for driving pocket screws | $0 (own) or $60 to $100 |
| 1 | Tape measure and pencil | 25 ft, retractable | $8 to $15 |
| 1 | Foam brush or clean cotton rag | for stain application | $2 to $4 |
| Tools subtotal (if buying everything) | $235 to $359 | ||
If you have to buy everything
| Combined total | $342 to $517 | ||
Prices reflect Amazon and Home Depot ranges as of late 2025; verify before purchase. Most readers already own a drill and some kind of saw, which puts the realistic out-of-pocket closer to $150.
Step 1: Size the trio and pick your wood
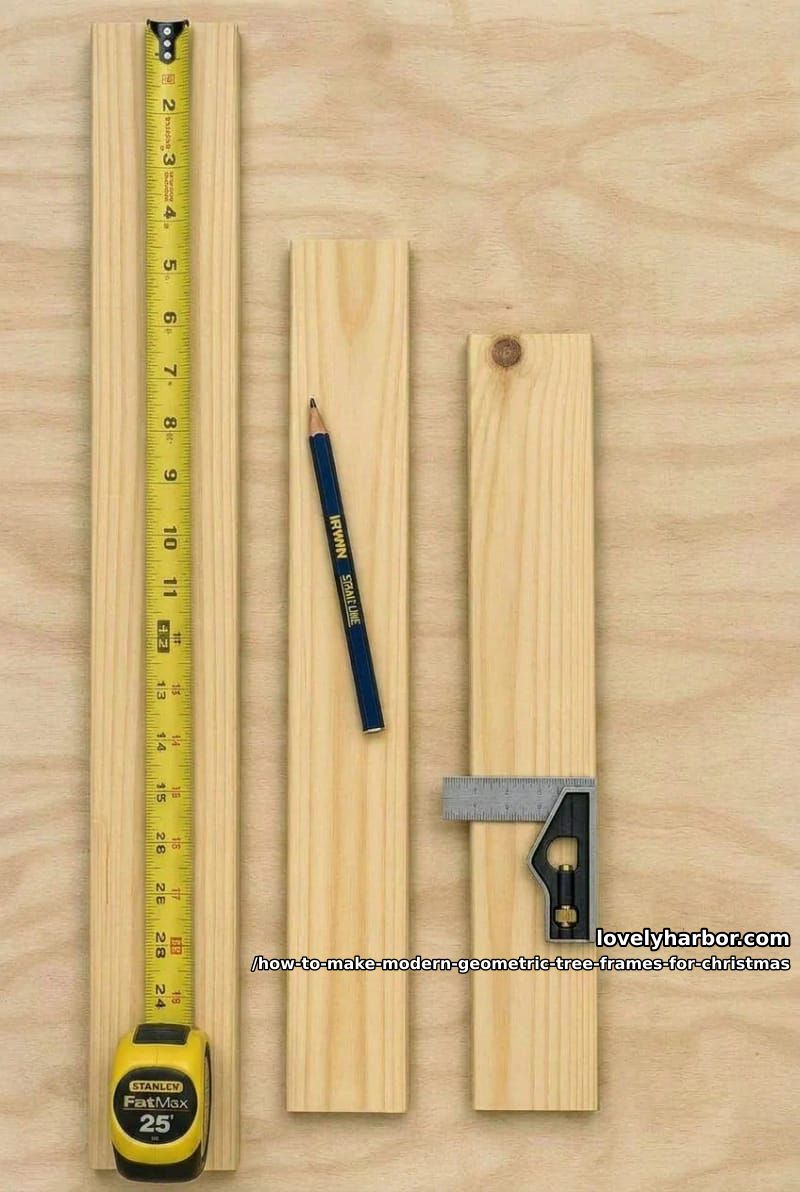
Pick the straightest 1x2x8 boards on the rack. Hold one end up to your eye and sight down the long edge like a rifle barrel; reject anything with a visible bow, twist, or cup. Knots are fine here, as long as none of them sits within two inches of a corner where a pocket hole is going to land. Select pine at Home Depot runs $5 to $8 a board. The cheaper Spruce-Pine-Fir 1×2 is around $4 and works, but it tends to cup as it dries indoors, which is annoying once you've already cut your angles.
Mark the cut list on every board before you start cutting. Long-point to long-point measurements:
Tall frame (48 in × 26 in): two side legs at 49-3/4 in, one base at 26 in.
Medium frame (36 in × 19 in): two side legs at 37-1/4 in, one base at 19 in.
Small frame (28 in × 15 in): two side legs at 29 in, one base at 15 in.
Each side leg gets a 15-degree cut at both ends, leaning the same way (a long parallelogram in profile). The base gets a 15-degree cut on each end, the two converging inward (a shallow trapezoid, wide face down), so the ends sit flat against the inside faces of the legs. The leg tops are not cut to a point, they overlap.
Step 2: Cut every end at the 15-degree setting
Set the saw to 15 degrees and lock it. Every cut is the same angle , you just flip the board to alternate which way the cut leans. Cut all six side legs, then the three bases. Hang onto the offcuts, those little triangular wedges. Glue two of them together and you've got the small pine-sprig holder that wedges into each apex.
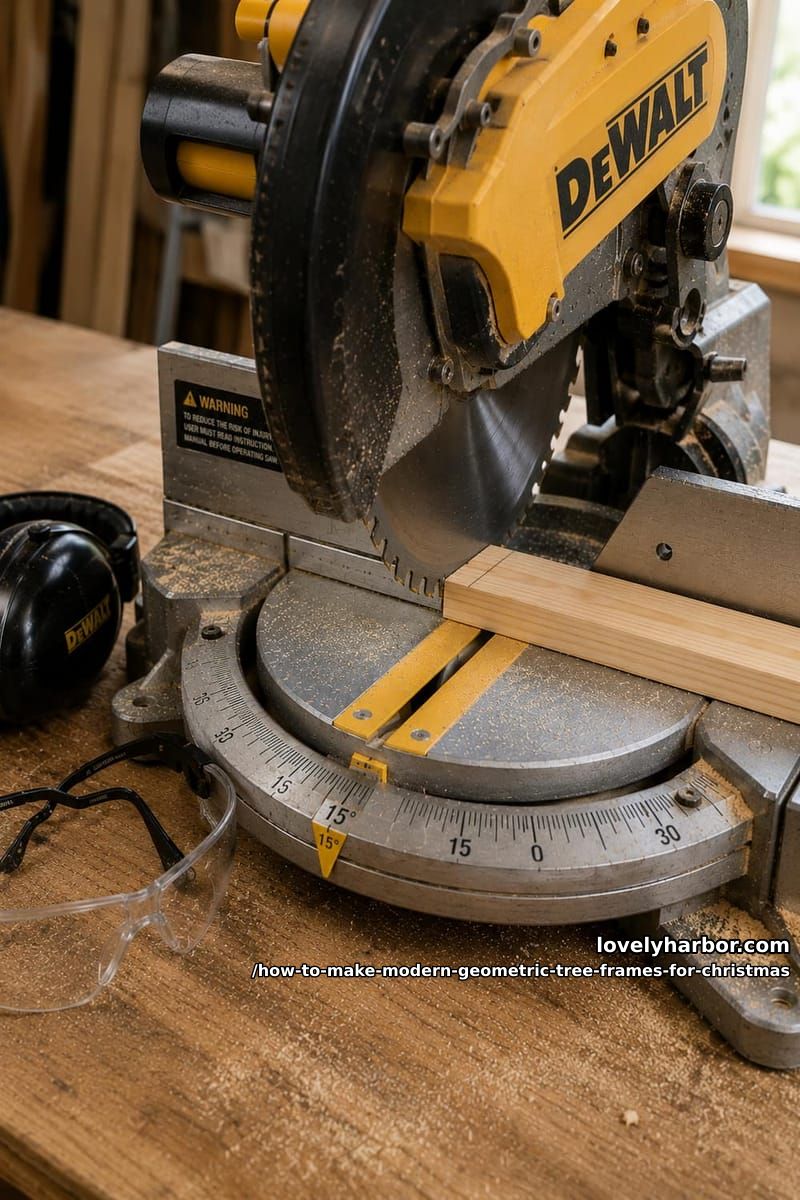
Never measure a partial cut while the blade is still spinning, and never use your hand to clear sawdust from inside the guard. The blade keeps moving for several seconds after you release the trigger. Wait for full stop on every cut.
Dry-fit each triangle on the floor before you commit to a single pocket hole. Overlap the two leg tops and slide the base in. If the corners don't close cleanly, your saw is half a degree off, and that error compounds across the joints. Recut the offending piece. Don't try to force the joint closed , pocket screws will close it for you, but the wood will tell on you a month later when it relaxes.
Step 3: Assemble each triangle with screws
Simpler alternative: Skip the screws and just glue the pieces together, The structure will be less strong, but it doesn’t have to support any meaningful weight anyway. But if you want something that lasts longer, then keep riding this section.
Pocket holes hide the screw on the inside of the frame, which matters because the inside face is the one catching all the light. Set the Kreg 320 jig to its 3/4-inch material setting (second notch from the top). Clamp it 3/4 inch from each end of the base board, on the face that'll end up inside, and drill two pocket holes per end about 1/2 inch apart — twelve holes across the three bases. The leg tops get no pocket holes; they overlap (Step 3.1). Drill at full speed in one pass , pecking at it splinters the exit side every time.
Step 3.1: Lap the apex first
Lay the two legs flat and bring their tops together so one overlaps the other face-to-face, the 15-degree top cuts aligned and the outer edges forming a clean peak of about 30 degrees. Run a thin bead of Titebond Original along the overlap, clamp it, and drive two 1-1/4 inch Kreg coarse screws through the back of the lap so the heads face the wall. Wipe the glue squeeze-out right away with a damp rag , within five minutes, ideally, because once it skins it has to be sanded off and that's a worse job than wiping was.
Want a true point instead of a lap? Cut the leg tops at 75 degrees (the real bisected miter for a 30-degree peak) and butt them, keeping a pocket hole at each top. A standard miter saw won't reach 75 degrees, so you'll need a miter sled, a table-saw crosscut jig, or a hand miter box.
Step 3.2: Attach the base last
The two legs now form an upside-down V. Slide the base up between the legs so its 15-degree ends sit flat against the inside faces of the legs near the bottom. The joint should close with light hand pressure. Glue, then drive the two pocket screws from each base end into the leg. Three corners per frame, six screws each, eighteen total for the trio.
Do this
- Use coarse-thread Kreg screws in softwood (fine threads strip out)
- Drive the screw until the head sits just flush with the bottom of the pocket. Then stop.
- Check the apex angle with a speed square before the glue cures
- Build all three frames the same day , if your saw drifts by half a degree, at least it drifts on all of them equally
Avoid
- Brad nails. They pull out within two seasons of storage handling.
- Skipping the glue. Screws alone leave a joint that creaks every time you pick up the frame.
- Driving screws into knots
- Overtightening, which strips the pocket and leaves the screw spinning
Step 4: Sand, then stain or leave bare
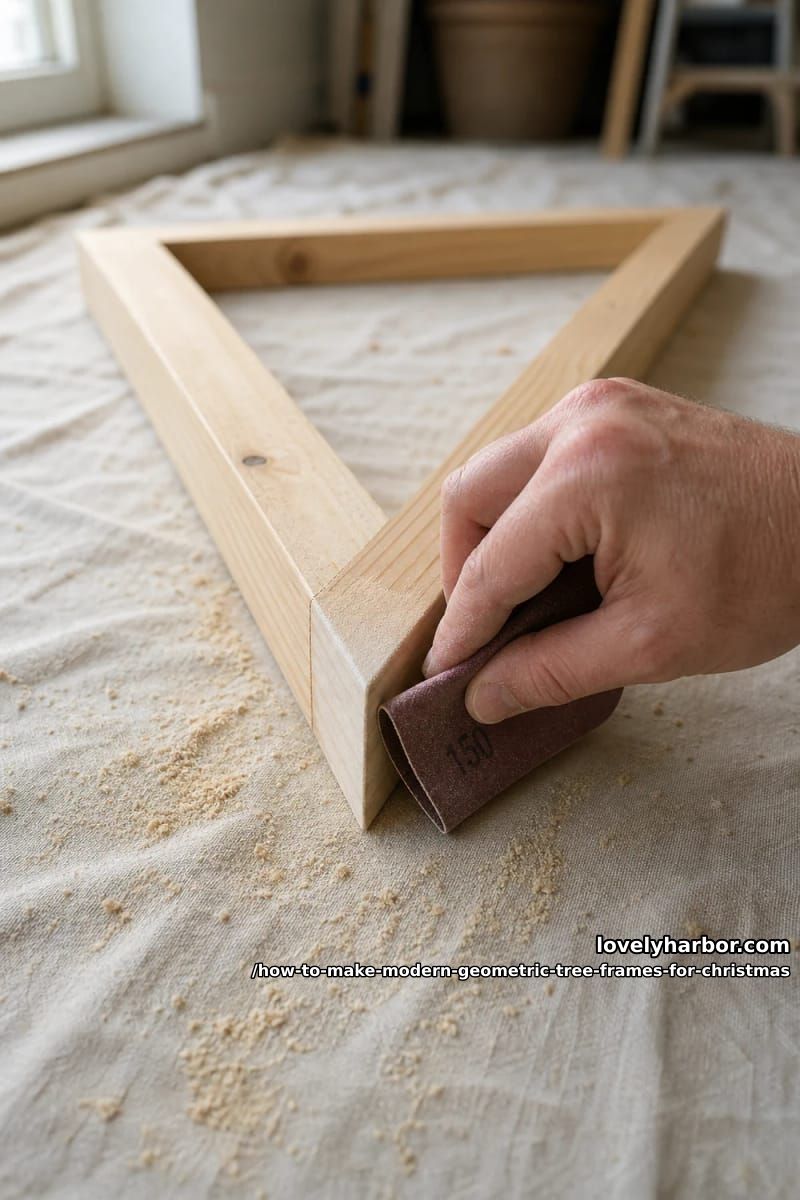
100-grit to knock down the saw marks at the joints, 150 across all four faces, a quick 220 pass on the edges that face into the room. The peak and base corners get the most attention , any squeeze-out you missed will resist stain and show up as a pale blotch later. Run a fingernail along each joint. If it catches, sand again.
Finish depends on your floor. Raw sanded pine yellows over a season and starts to fight pale white oak or LVP; against walnut or dark oak it looks fine left bare. If you want the cooler tone that reads as modern, wipe on one coat of Minwax Pickled Oak, let it sit five to ten minutes, then wipe off the excess with a clean cotton rag. Two hours dry. Second coat if you want it darker. Skip polyurethane , these frames live indoors and aren't going to see hands or wet glasses.
Pickled Oak is the stain I keep returning to for pine that needs to look more like white oak. It cools the pink-orange undertone without going gray.

Step 5: Wire in the fairy lights
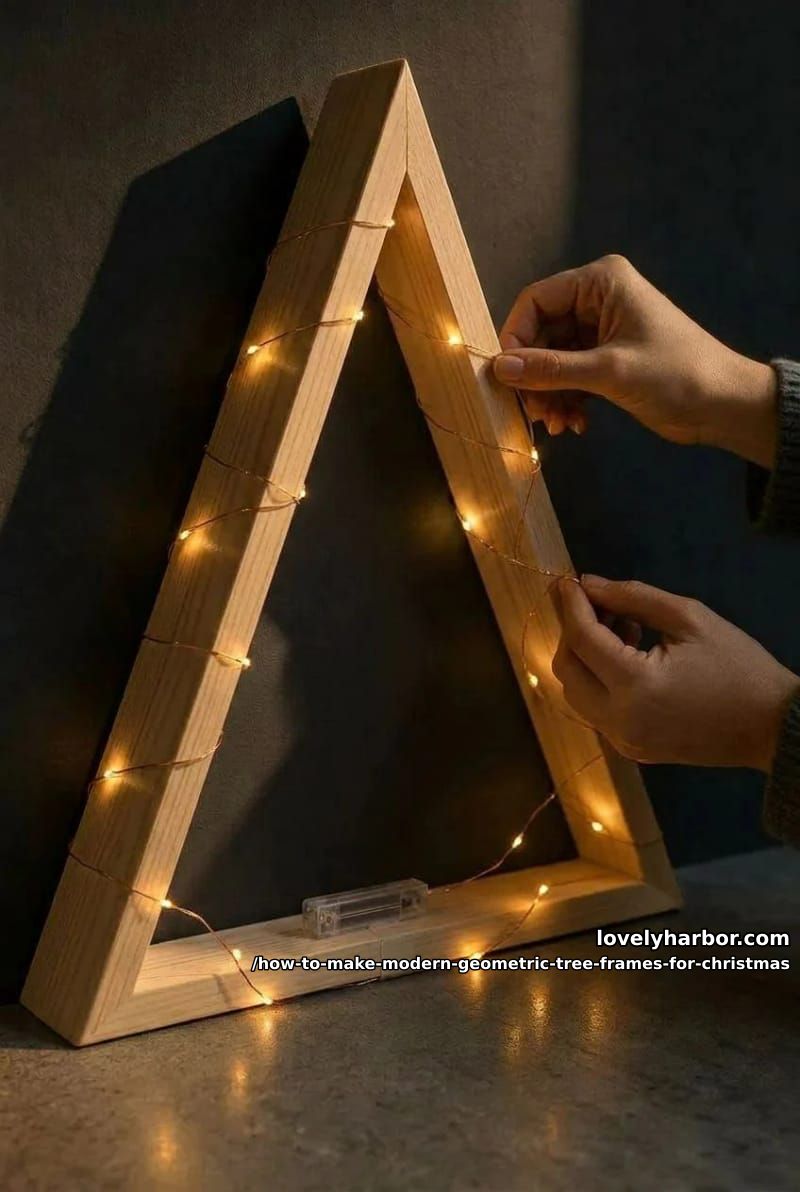
This is the step I overthought for two years before getting it right. One 33-foot string of 100 warm-white LEDs covers a frame with light to spare. Tape the battery box to the back of the base rail with a strip of clear gaffer's tape (not masking , masking yellows and peels), then run the lead wire up the inside back edge of one leg.
From there it's a choice, and the choice actually matters. The denser-at-the-base look in the reference image comes from wrapping the lights around the wood at the bottom and letting them drape vertically across the open interior of the triangle, like a curtain. The cleaner architectural look comes from running them in a single line straight up one leg, across the apex, and back down the other. I prefer the draped version on the largest frame and the cleaner wrap on the two smaller ones. Three identical effects read as monotonous; mixing two reads as composed.
The 33-foot strings run on 3 AA batteries and last 60 to 80 hours on the steady-on setting. Set the included remote to the 6-hours-on-18-hours-off timer so the frames light up at the same time every evening without you having to remember. Replace batteries on December 26, and again around New Year's if you're still running them. Cold rooms drain alkaline cells faster than warm ones, which is the kind of fact you only learn after a string dies during a dinner party.
The 8-mode remote is the feature you’ll actually use. Steady-on for everyday, slow fade for parties, off when you go to bed without standing up.

Step 6: Style with sprigs, pinecones, and baubles
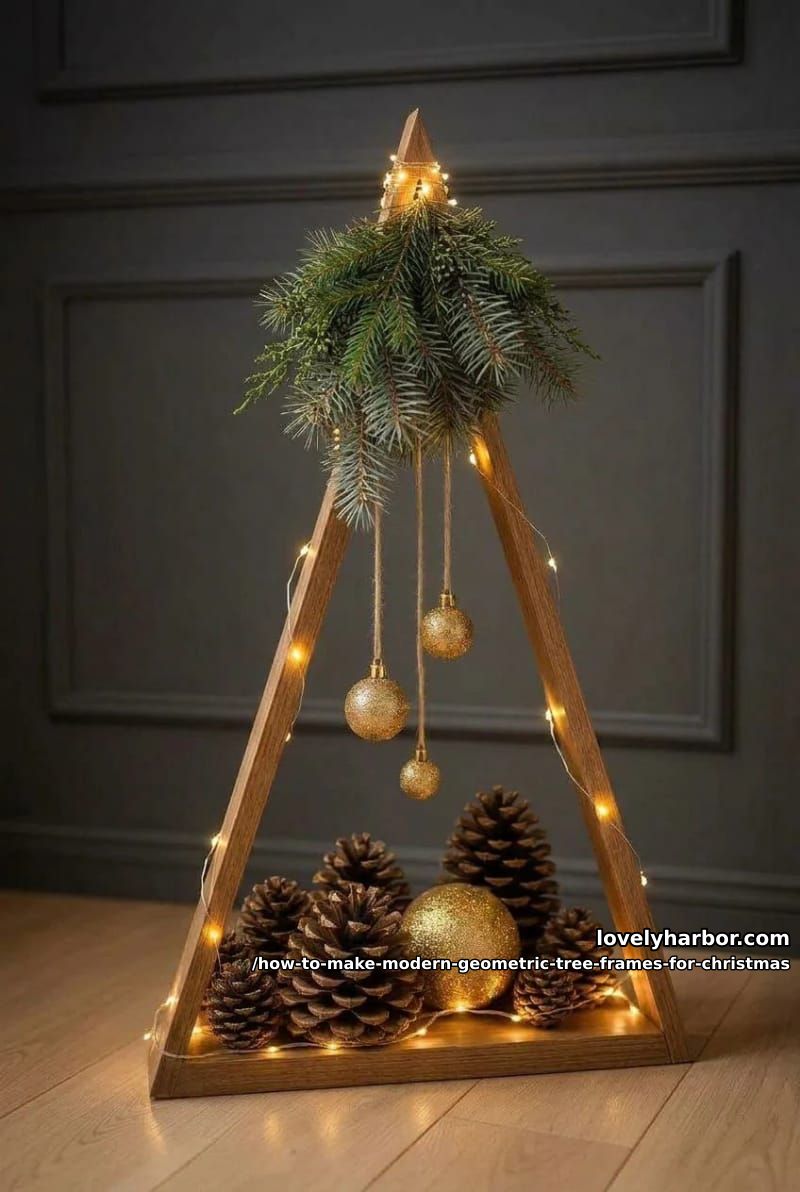
Three elements, no more: greenery, pinecones, ornaments. Add a fourth and the frames start looking like a craft store endcap. The reference image works because it commits to the limit.
Step 6.1: Apex sprigs
Stuff a small tuft of fresh blue spruce or noble fir into the apex of each frame. Tree lots will give you the trimmings for nothing if you ask when they're shaping trunks for stands; I've never had one say no. The sprig should poke three to four inches above the apex, fanned a little. No artificial picks. The whole point of the geometric frame is clean lines against one piece of slightly-wild nature, and fake greenery kills the contrast dead.
Step 6.2: Hanging ornaments
Cut three to five lengths of jute twine, varying from 6 to 14 inches. Loop each one through the cap of a glitter ornament and tie it to the top inside edge of the frame so the ornament hangs free inside the open triangle. Only the largest frame gets hanging ornaments , load up the smaller two and the cluster reads as busy. Stagger the heights. Two ornaments at the same length looks like a mistake even if you can't say why.
Step 6.3: Base pile
Pile cleaned pinecones inside the base of each frame, denser at the larger frames, two or three at the smallest. A single oversized glitter sphere (the 4-inch shatterproof balls are the right size) nestled among the cones reads as intentional. A scatter of small ornaments around the base reads as a craft project somebody forgot about.
Mistakes that ruin the build
- Mismatched cuts. Half a degree off and the base corners won’t close and the peak won’t sit square. Always dry-fit before drilling pocket holes; the time to find the error is before you commit a screw.
- Pocket holes on the wrong face. They go on the inside face , the one facing into the open triangle. Put them on the outside and they read from across the room, with no fix short of filler and a recoat.
- Smearing glue into the joint and not wiping. Squeeze-out blocks stain absorption and shows up as pale streaks. Damp rag, within five minutes.
- Heavy ornaments on thin twine. A 4-inch glass ball weighs more than 2-mm jute can hold for a month. Shatterproof plastic for anything you hang from twine; glass goes on the floor at the base.
- Wrapping lights over the corner joints. The copper wire pinches against the screw head and can cut through its own insulation over time. Tape the lights to the back face of the frame at each corner instead.
- Building one instead of three. A solo triangle looks like a project. Three look like decor.
Build-day timing
- Saturday, 9 to 10 a.m.: Buy or gather materials. Order the pocket-hole jig and stain earlier in the week if you’re going Amazon for those.
- 10 to 11 a.m.: Mark and cut all 12 pieces (6 side legs, 3 bases, plus 3 spare offcuts for apex sprig holders if you want them).
- 11 a.m. to noon: Drill all pocket holes (12 holes total, two at each end of the three bases).
- Noon to 1 p.m.: Glue and screw all three frames. Wipe squeeze-out.
- 1 to 2 p.m.: Lunch. Glue cures.
- 2 to 3 p.m.: Sand all three frames.
- 3 to 3:30 p.m.: Stain. Wipe excess.
- Let stain dry overnight. Touch-dry in two hours, but the odor lingers in a small room.
- Sunday morning: Lights, greenery, pinecones, ornaments. Style the cluster against the wall.
Conclusion
Three years in, the joints on my originals still close cleanly at the corners, which is the only test that matters for whether pocket-hole joinery was worth the extra step. (It was.) The thing I'd tell anyone starting out is that the staggered heights matter more than the wood finish , I built a single 48-inch frame the first year and it looked stranded against a 9-foot ceiling. The 48/36/28 pattern reads correctly at any wall up to about 10 feet. Taller, scale the largest to 60 inches. Lower, drop it to 42.
One thing I'd push back on in my own advice: I told you above to skip artificial greenery, and I stand by it for the apex sprigs, but if you're storing the frames assembled and the spruce dries out by week two, a small faux tip tucked behind the real one will keep the silhouette while you wait for fresh trimmings. Nobody will look that closely. Store the frames flat behind a sofa or against the back of a closet, lights coiled and taped to the base rail.