
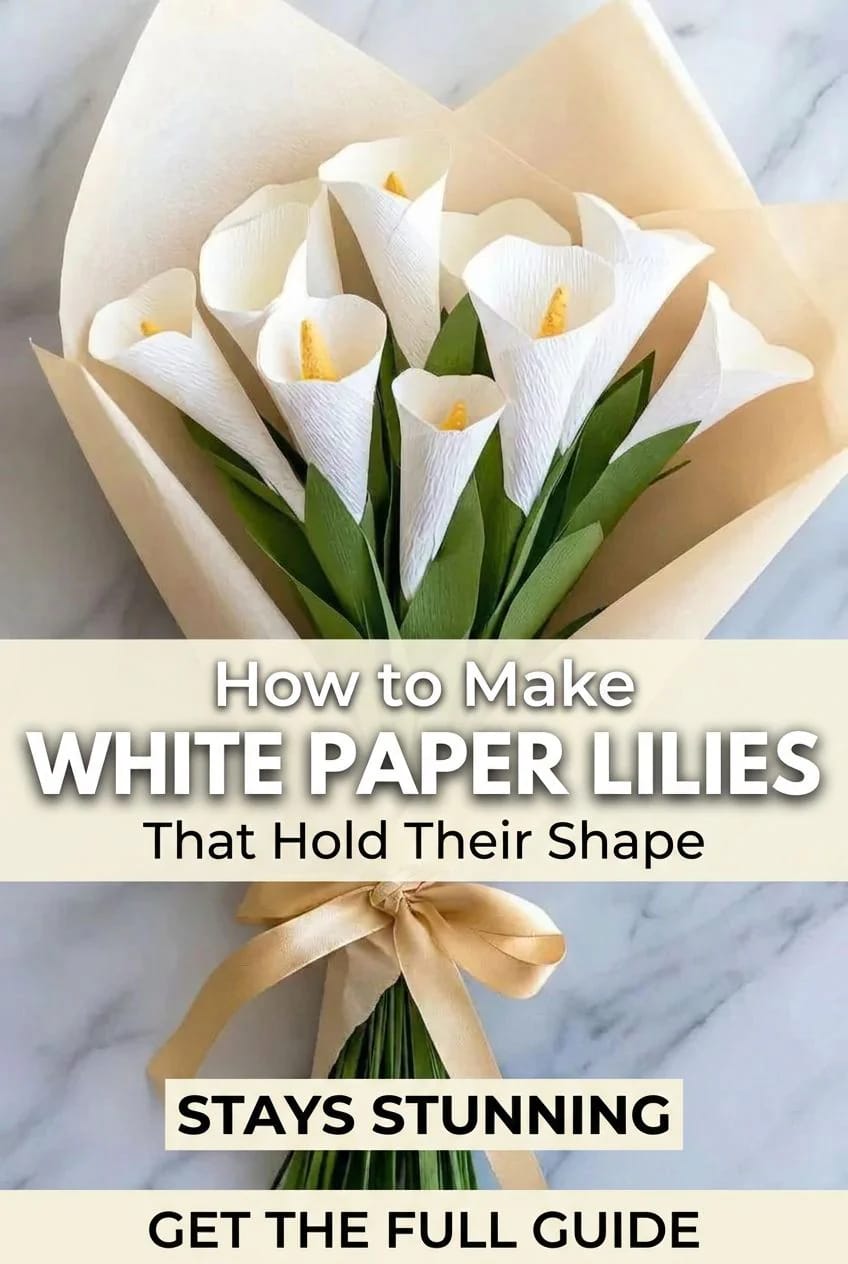
A calla lily is a single petal. Not a cluster, not a whorl of overlapping layers, just one curved sheet wrapped once around a yellow rod. That structure is why a bouquet of seven white paper callas is a two-evening project instead of a two-week one, and why it is the flower to start with if you have never made paper flowers before.
Nearly all of the difficulty sits in about an inch of paper. The throat, where the petal crosses itself around the spadix, either closes into a clean funnel or gapes open and shows the wire. Everything else is cutting, taping, and tying.
What follows builds seven blooms, wrapped in kraft paper and finished with a wide gold bow, sized for a hand-held bouquet or a tall vase. Three of them in a low bowl works just as well for a dinner table. Buying every material from scratch runs roughly $62 to $97, and most of that is paper you will not come close to using up.
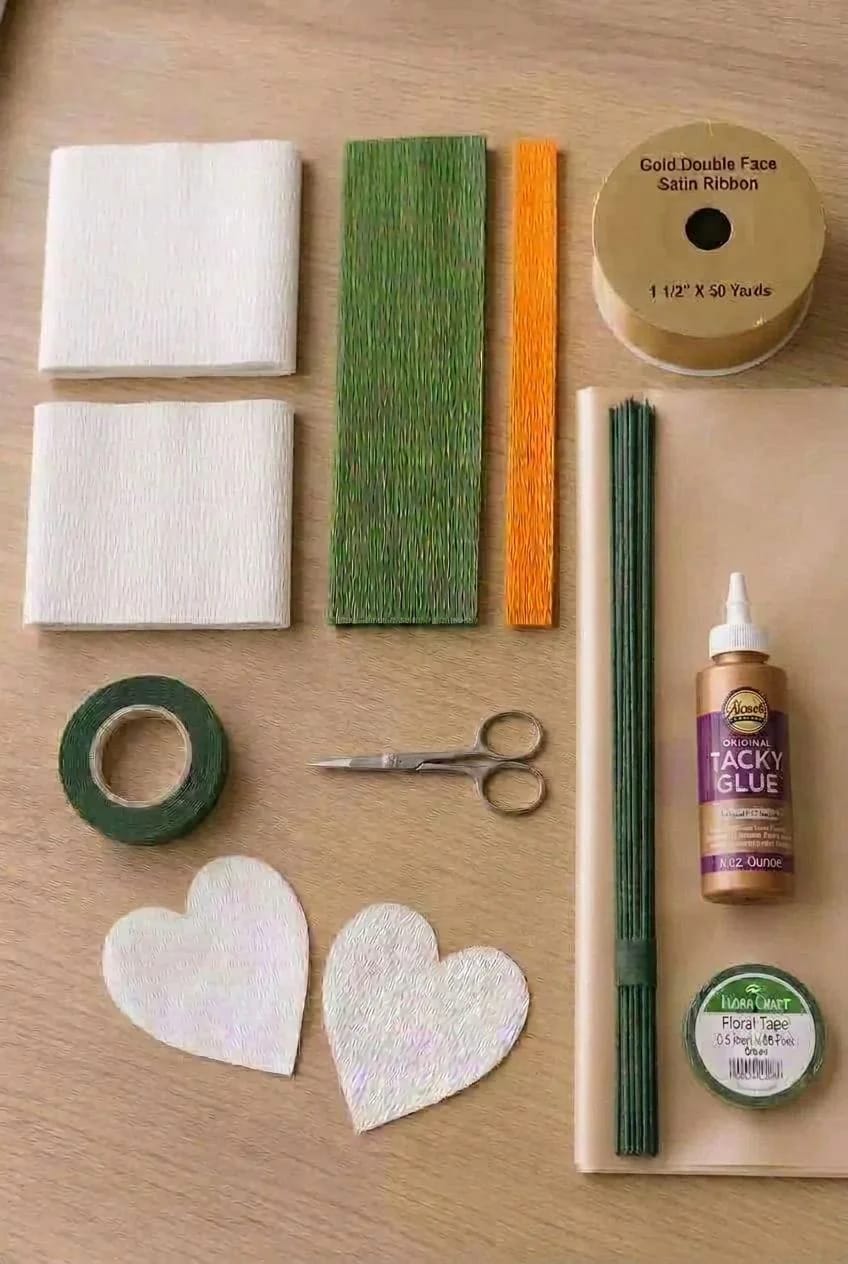
The Shopping List, Split Two Ways
The materials are the real cost here; the tools are mostly already in your kitchen drawer. Seven fresh callas from a florist run more than this entire supply list, which is the arithmetic behind most wedding decor that gets made rather than bought, and the paper version does not wilt on the drive over.
Materials
| Qty | Item | Spec | Price |
|---|---|---|---|
| 1 | FloristryWarehouse 180g Italian crepe paper roll, white | 20 in wide x 8 ft, shade 600, made by Cartotecnica Rossi | $10 to $16 |
| 1 | Lia Griffith extra fine crepe paper, Enchanted Garden 10 pack | Covers Evergreen and Juniper for leaves, Mango for the spadix | $18 to $26 |
| 1 pk | DECORA 18 gauge dark green paper wrapped floral wire | 16 in stems, 50 per package (you need 7) | $7 to $11 |
| 1 | FloraCraft green floral tape | 5 in x 60 ft, self sealing wax type | $3 to $6 |
| 1 | Aleene’s Original Tacky Glue | 4 oz, thick bodied, dries clear | $3 to $5 |
| 2 sheets | The Florist Supply waterproof flower wrapping sheets, kraft and gold | 8 in square, double sided, 20 per pack | $12 to $18 |
| 1 spool | Gold double face satin ribbon | 5 in wide x 50 yd, satin on both faces | $9 to $15 |
| Materials subtotal | $62 to $97 | ||
Tools
| Qty | Item | Spec | Price |
|---|---|---|---|
| 1 | Small sharp scissors | Pointed embroidery or craft scissors, not kitchen shears | $0 to $10 |
| 1 | Wire cutters | Or an old pair of scissors you are willing to dull | $0 to $12 |
| 1 | Cardstock for the template | A cereal box is the right weight | Free |
| 1 | A skewer, chopstick, or knitting needle | For curling the rim | Free |
| Tools subtotal | $0 to $22 | ||
| Everything, bought from scratch | $62 to $119 |
Prices are approximate ranges as of July 2026; verify before purchase.
Which Crepe Paper to Buy, Because This Is the Decision That Matters
Buy 180 gram Italian crepe for the petals and nothing lighter. Most tutorials tell you to use whatever white crepe you already have, and that advice is why so many paper callas end up looking like party hats: the throat needs to be stretched thin across the middle and still hold a curve afterward, and only heavy crepe does both. The 180 gram stock has enough body that the funnel supports itself without a wire running through the rim.
Weight is not the only spec worth checking. Crepe comes in bright white and a softer plain white, and the softer one reads as a flower while the bright one reads as printer paper under warm light. Stretch percentage matters too: the heavy Italian papers stretch far more than party streamers, which is exactly the property you are relying on when you cup the petal.
You will use maybe a fifth of the white roll on seven blooms. The same paper carries roses, poppies, and ranunculus, so if the leftover bothers you, there are eleven other paper flower projects that will finish the roll.
Do this
- Use 180 gram Italian crepe (Cartotecnica Rossi and its relabels) for every petal.
- Drop to extra fine 60 gram crepe for the leaves, where a little droop looks correct.
- Cut every piece with the grain running vertically, top to bottom. This is not optional and it is covered again below.
- Test one petal before cutting six more.
Avoid
- Party streamer crepe, around 35 gram. It splits when you stretch the throat, and whatever survives folds flat overnight.
- Cardstock. It creases rather than curving, so the mouth comes out faceted instead of round.
- Double sided crepe. You are paying for a second color that lives entirely inside a closed funnel.
- Tissue paper, which goes translucent wherever the glue sits.
Cut One Petal for Each Flower
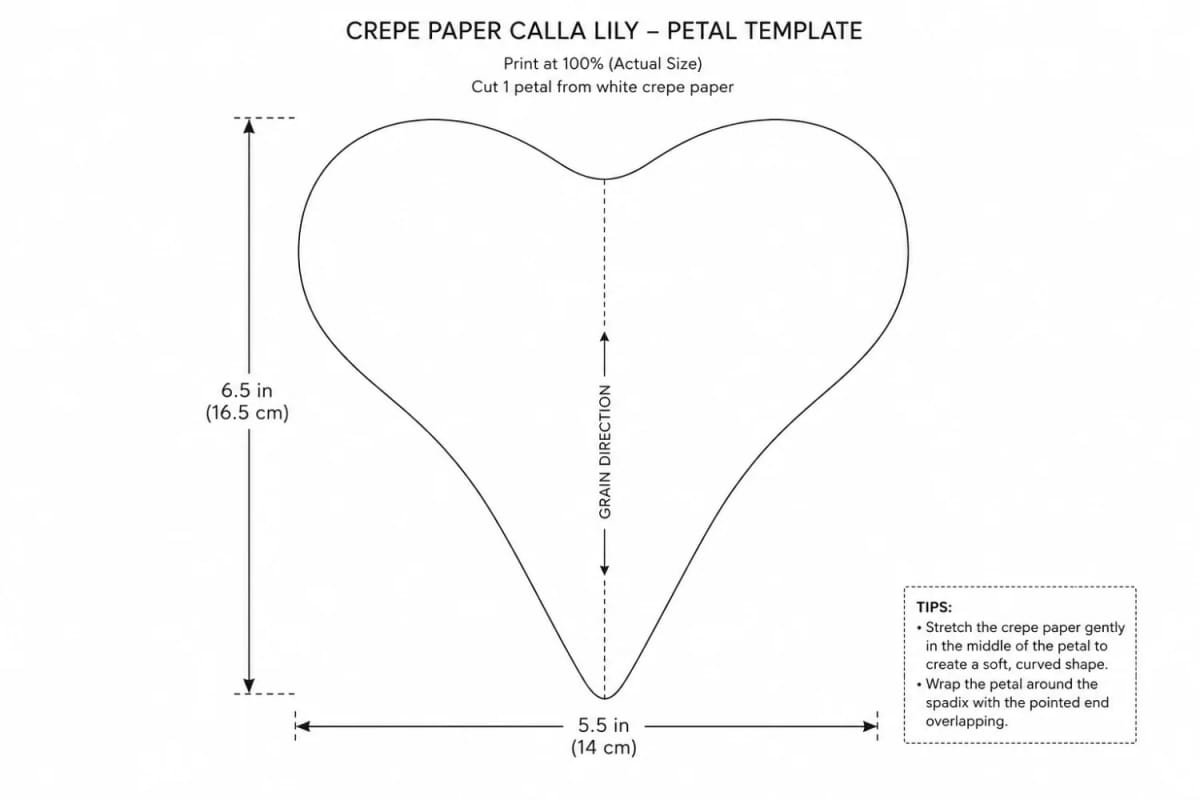
Draw the template on cardstock first, then trace it onto the crepe. Freehand cutting produces seven slightly different flowers, and in a tight bundle the differences read as sloppiness rather than as charm.
- Draw a rounded heart roughly 5 to 6 inches across at its widest and 6 to 7 inches tall, tapering to a point at the top and a narrow base at the bottom. Published templates cluster in that range, but the shape carries more weight than the exact number.
- Check the width before committing. Roll the cut template dry around a skewer. The edges should cross each other by about an inch. Too narrow and the throat will gape.
- Position the template so the grain runs vertically, from the point down to the base. The stretch has to run side to side across the petal.
- Cut seven. Then cut fourteen leaves from the green, long and pointed, anywhere from 5 to 9 inches so they do not all reach the same height.
 How to Make Felt Flowers (With a Free Printable Petal Template) A free petal template sized for three flower diameters, plus the shaping trick that keeps petals from sitting flat.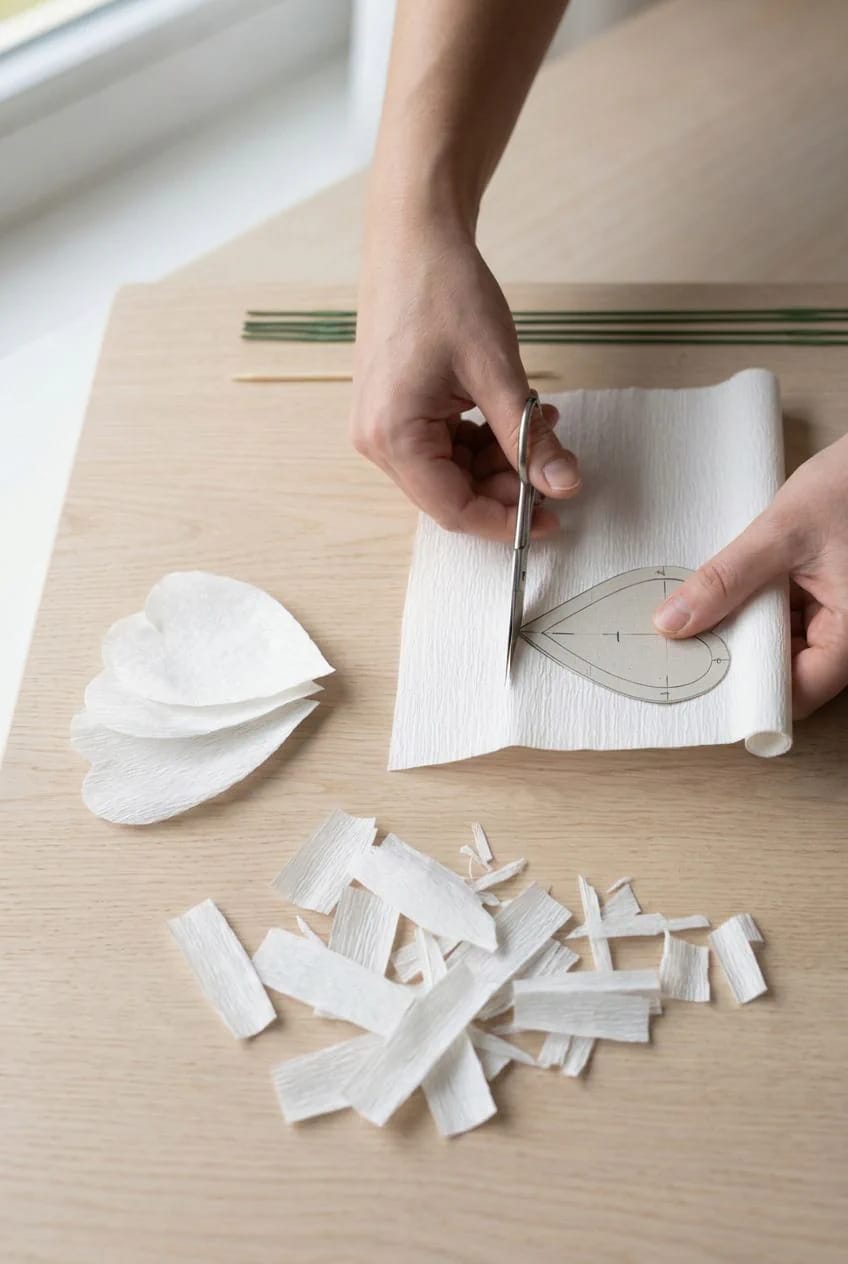
Build the Spadix Before Anything Else
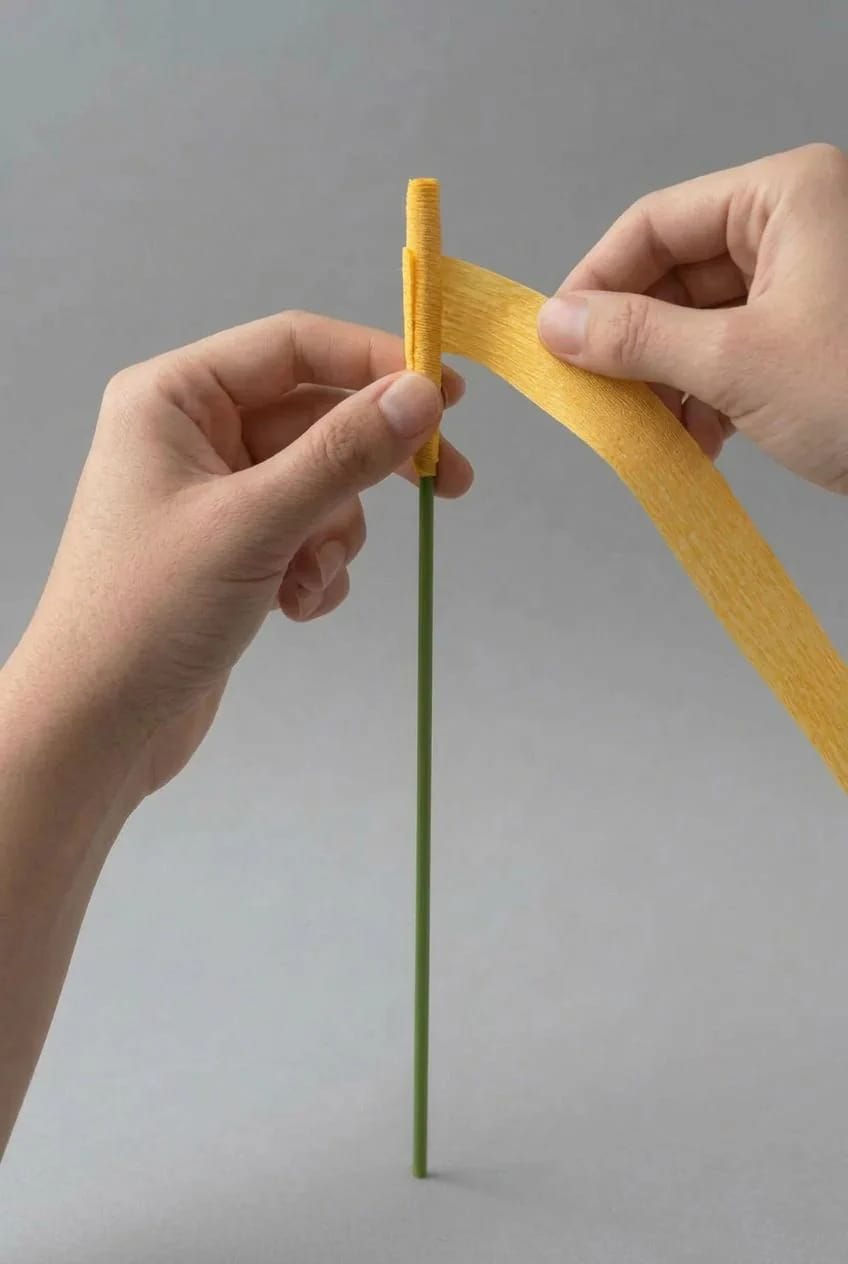
The yellow center gets made first because the petal wraps around it, not the other way round. Cut a strip of yellow crepe about 2 inches wide and 6 inches long, again with the grain running the short way, brush a thin line of tacky glue along one long edge, and roll it around the top of the wire while pinching the bottom tight and letting the top stay full. You want a tapered cone, thicker at the base, blunt at the tip.
Spadix: 1.5 to 2 inches of yellow showing above the petal base, tapering from roughly 3/8 inch at the bottom to a blunt tip.
Petal: 5 to 6 inches wide, 6 to 7 inches tall, cut as a rounded heart with a point.
Overlap at the throat: about 1 inch of petal crossing itself.
Stem: 12 to 16 inches for a hand-held bundle, trimmed shorter for a vase.
Curl the Rim, Then Close the Throat
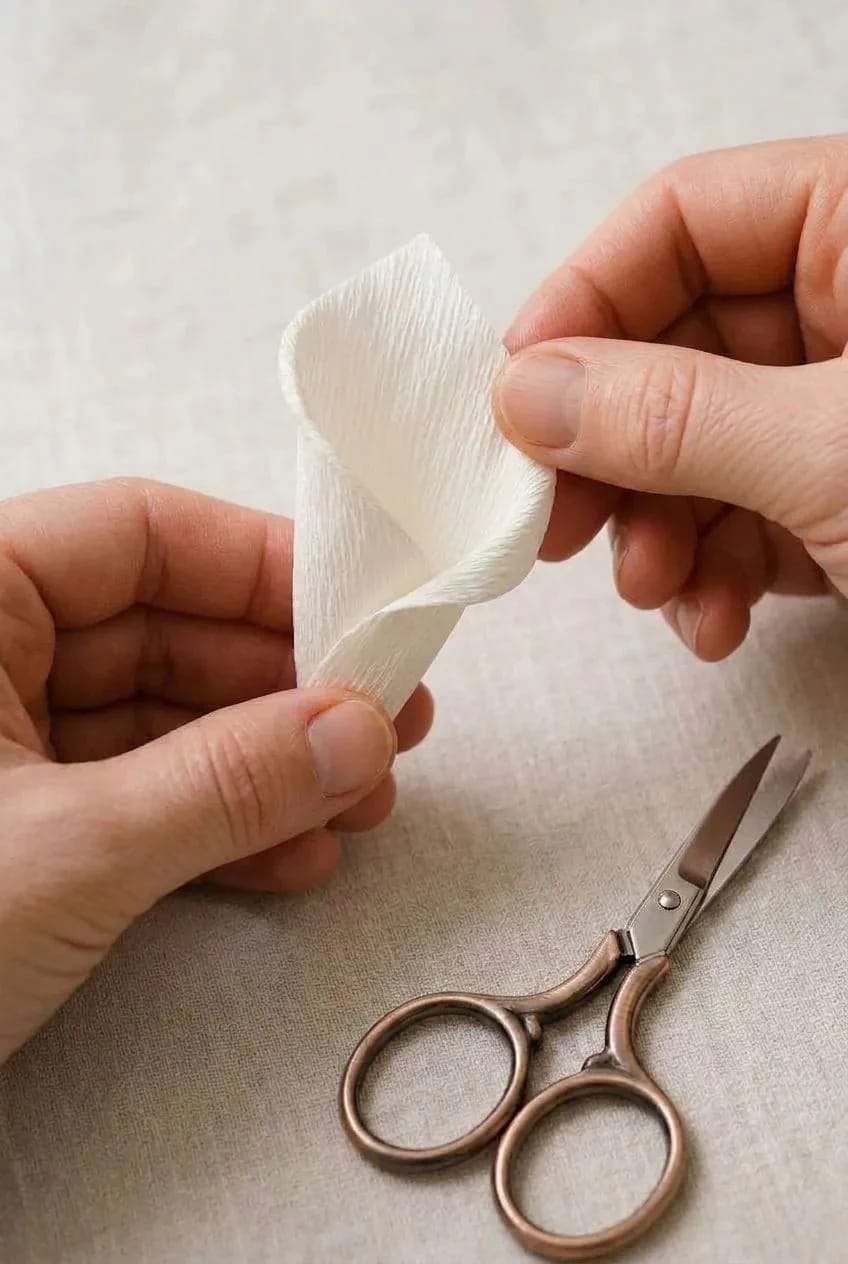
Shape the petal completely before any glue touches it. This is the step that separates a paper calla from a cone with a stick in it, and it happens in a fixed order: curl, stretch, then wrap.
- Curl the top edges outward. Take the top inch and a half of each long edge and roll it away from you between your thumb and index finger, working in short overlapping passes rather than one long drag. A skewer helps if your fingers are dry.
- Stretch the middle. Hold the petal with both thumbs at its center and pull outward gently. The paper opens up and the flat sheet becomes a shallow bowl. Go slowly; the fibres will let you know when you are close.
- Dry fit. Set the spadix into the cupped center, base of the wire against the base of the petal, and wrap one side over, then the other.
- Glue and hold. A thin line of tacky glue at the base only, not up the whole seam. Pinch for thirty seconds, then clip a clothespin at the base while it cures.
Glue placement is worth being stubborn about. If you run adhesive up the entire overlap, the throat sets rigid and flat instead of flaring, and there is no undoing it. The lower half inch is doing all the structural work anyway.
Curl before you close, never after. Once the throat is glued shut you cannot get a finger inside to roll the rim, and an uncurled edge is the single most obvious tell in a homemade paper calla. Stop rolling the moment the paper starts to fuzz along the edge, because the next pass tears it.
Leaves, Stems, and the Green Fringe
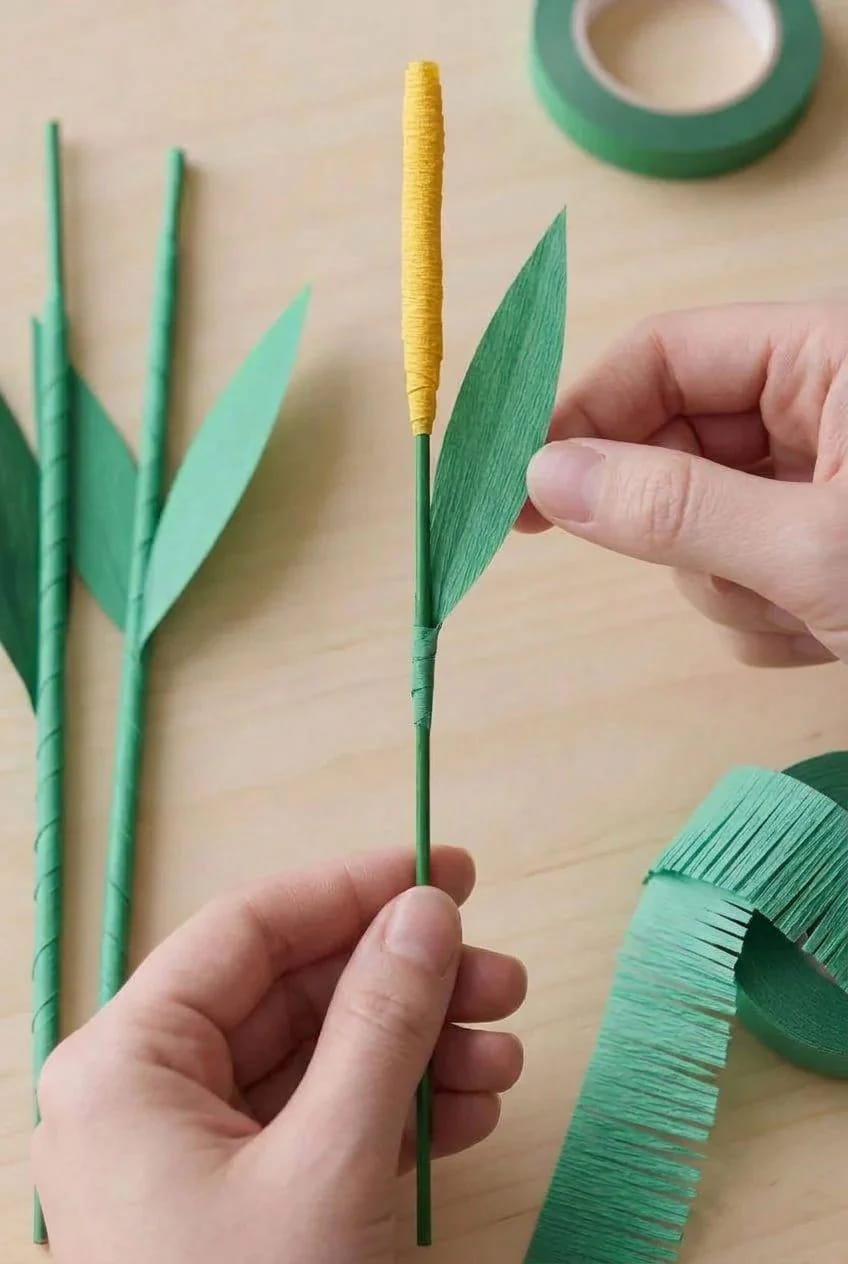
Wrap the stem before adding leaves, working the floral tape from just under the flower base downward and stretching it as you go so the wax activates. Add each leaf against the taped stem and carry the tape over its base for three or four turns, staggering the heights so the bundle has depth rather than a single leaf line.
The fringe at the bottom of the bundle is the detail people notice without being able to name it. Cut a strip of green crepe about 3 inches deep, snip it into fine strands most of the way up, and wrap it around the collected stem ends once the bouquet is gathered. It hides seven cut wire tips at once.
Wrap It, Then Tie the Bow
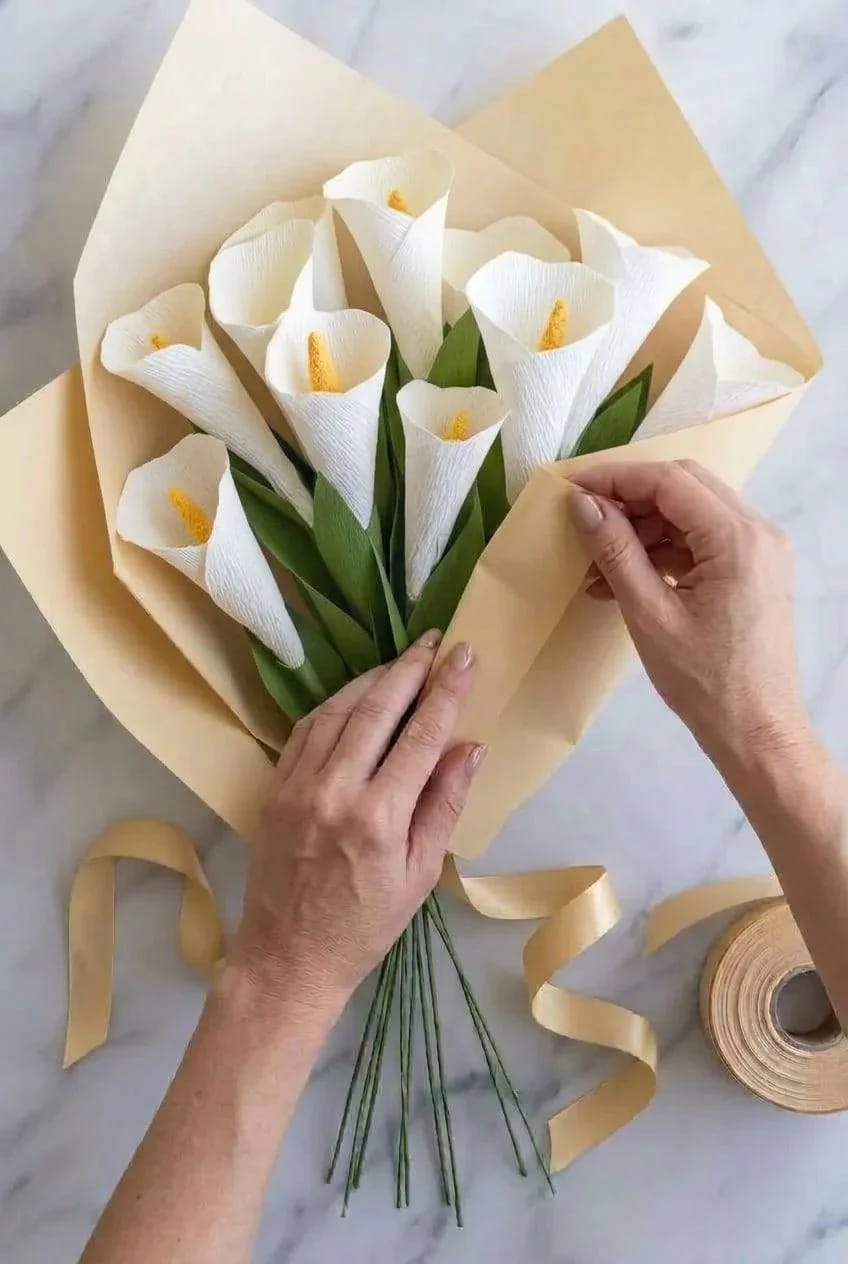
Gather the seven stems in one hand, twist them a quarter turn so the blooms spiral outward rather than sitting in a flat row, and bind the bundle with tape before the paper goes anywhere near it. A bundle that is not already secure will shift inside the wrap and no amount of ribbon fixes it.
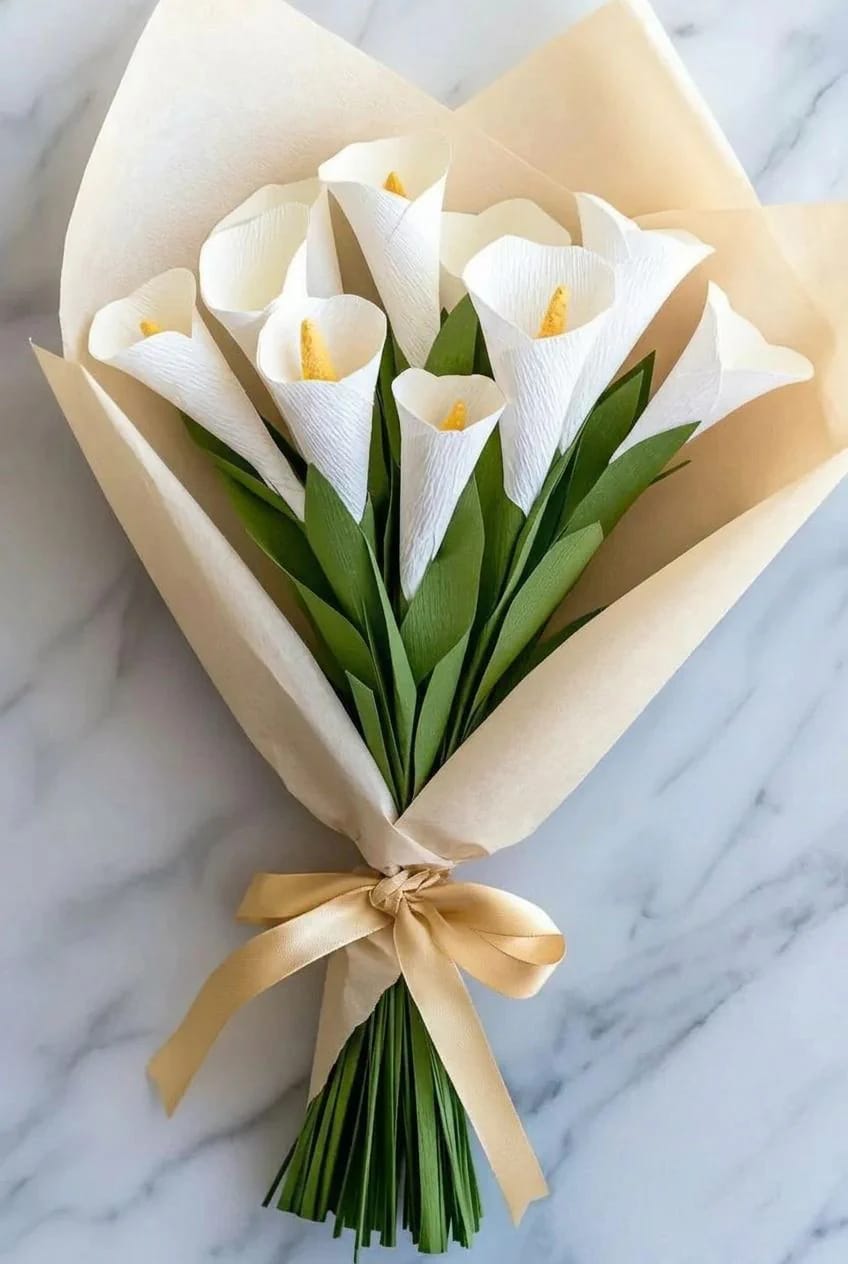
Lay two kraft sheets at an offset angle, set the bouquet diagonally across them, fold up from the bottom, then bring each side in and around. Fold, do not crush. The standing points at the top edge are what makes it look like a florist did it.
Ribbon width is where most people undershoot. A 1.5 inch satin holds the bundle visually; a thin curling ribbon disappears against it. The reasoning is the same one that governs how much velvet a Christmas tree can carry before it tips into craft-store territory, namely that the ribbon has to match the mass it sits against. Tie a simple bow with long tails and leave the tails uncut for a day, then trim them at a slant once you have seen the bouquet standing up.
 15 Charming DIY Wedding Table Centerpiece Ideas Fifteen table arrangements you can build yourself, several of which take a wrapped bundle of stems exactly like this one.
The Two-Evening Build Sequence
Glue cure time is the only thing forcing this across two sessions, and it is genuinely worth respecting. A throat taped up while the glue is still soft will open again by morning.
Evening one, about 90 minutes
- Cut the cardstock template, then cut one test petal and dry wrap it around a skewer to check the width.
- Cut the remaining six petals, fourteen leaves, and seven yellow strips.
- Build all seven spadices. Set them upright in a jar for 20 minutes while the glue grabs.
- Curl, stretch, and close all seven throats. Clothespin at each base and leave them overnight.
Evening two, about 45 minutes
- Remove the clothespins and check every throat. Re-glue any that opened.
- Tape the stems, adding leaves at staggered heights as you work down.
- Gather and bind the bundle, then fringe the stem ends.
- Wrap in kraft paper and tie the bow. Trim the tails the following day.
Mistakes That Ruin Paper Callas
- Grain running sideways. The petal will not stretch across its middle, so the throat stays flat and creases instead of cupping.
- Reaching for the hot glue gun. It ripples heavy crepe on contact, leaves visible strings across a white surface, and sets faster than you can reposition the overlap.
- A spadix that outgrows its petal. More than about 2 inches of yellow showing and the flower reads as something on a stick rather than as a bloom.
- Taping the stem before the throat has cured. The twisting motion of wrapping tape transfers straight up into the seam.
- Cutting all seven petals from one traced outline without testing. If the width is wrong you find out six petals too late.
Where to Put Them
Wrapped, they are a gift; unwrapped, they are a permanent arrangement. Three callas and a few leaves in a low ceramic bowl hold their own against any of the modern floral centerpieces built from fresh stems, with the advantage that they survive a week of being pushed around a table and repositioned by whoever is setting it. They never wilt and they never droop, so the arrangement you make on Sunday is the arrangement you have on Friday.
We keep making these instead of buying stems for one unglamorous reason: no pollen, so nobody sneezes at the table.
One roll of white crepe makes something like thirty of these, which means the marginal cost of the eighth flower is close to nothing and the marginal cost of the first is most of the shopping list. That asymmetry is an argument for making more than you need in one sitting, while the template is already cut and your fingers have found the right pressure for curling.
If your first bloom comes out with a lopsided throat, keep it and set it at the back of the bundle. Mine did too, and in a bouquet of seven nobody has ever picked it out.
Related Posts
- Make Blooms That Last Forever: 11 Creative Paper Flower Ideas
- How to Make Felt Flowers (With a Free Printable Petal Template)
- How to Make Twine String Ball Ornaments That Hold Their Shape
- How to Make a Layered Green Paper Tree for Your Wall
- 15 Pressed Flower Craft Ideas for Your Next Project
- 5 DIY Pipe Cleaner Flowers That Add Instant Color and Charm